Digital Scrapbooking With A Joystick and an Arduino ESP-32

For this project, I used an Arduino ESP-32 to read data from a joystick and button. Using this setup, the user can flip through an array of images uploaded to the software, move them around the screen, and set them where they want. When they are done, the software generates a PDF of their completed collage. See more below!
View this project on my GitHub
THE PROJECT
This March, I had the privilege to visit a friend in Madrid for a week. Upon my return, I found myself wondering what to do with all the wonderful photos and souveniers I’d collected along the way. The result was this project– a generative digital scrapbooking device. With a joystick and a button, the user can move their selection of images around on the screen and place them where they choose.
HOW IT WORKS
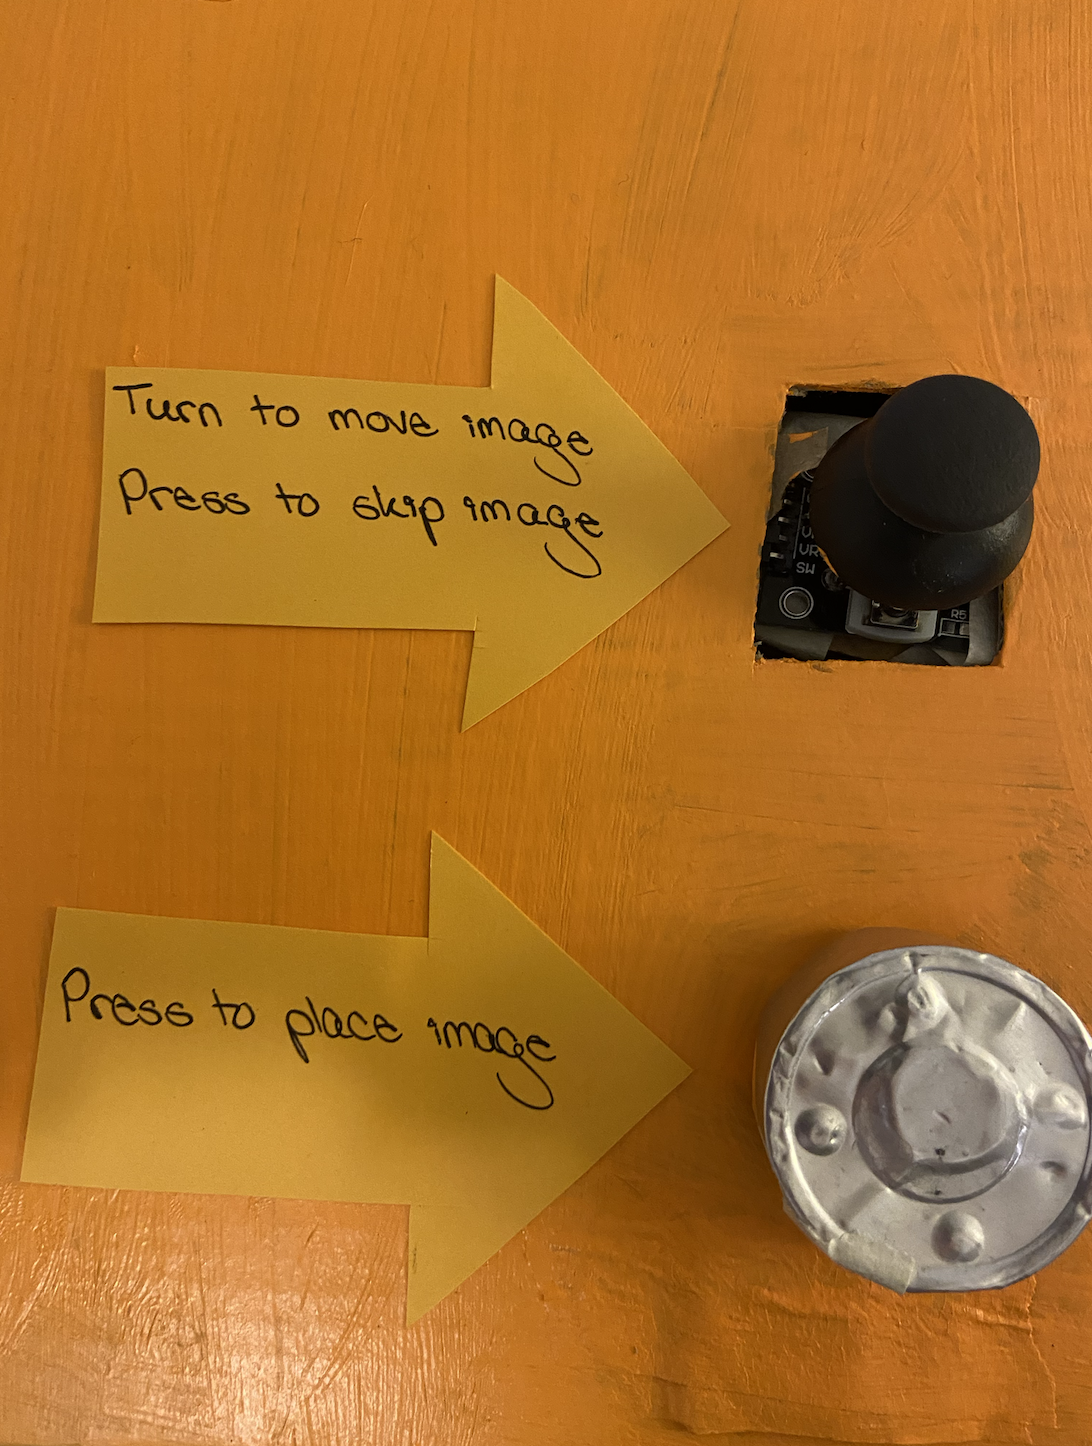
When the device starts, it immediately loads up an array of images and then selects one at random by indexing the array at a random number. Moving the joystick moves the image, pushing the button places the image, and pushing the joystick skips to a different randomly selected image. Pushing the button and the joystick simultaneously exits the program.
I chose these actions because I felt that they let the user have the scrapbooking experience while still constraining them enough to force creativity. As I used this device, the constraint of the software choosing the image for me forced me to go in directions that I wouldn’t normally seek out on my own, creating opportunities for creativity and newness.
In another iteration of this device, I would love to add additional hardware that would allow the user to resize or rotate the images, but with only a single joystick and button at my disposal, these options weren’t in the cards for this device.
MATERIALS
HARDWARE
- Arduino ESP-32 TTGO T-display like this one
- USB-C cord (make sure that your cord support data transfer, not just power!) see more about this here
- Breadboard
- Joystick
- Button
- Wires Depending on your setup, you may need male-to-male, male-to-female, or female-to-female wires. My setup uses 7 male-to-female wires.
SOFTWARE
- Arduino IDE download here
- Processing IDE download here
STEPS
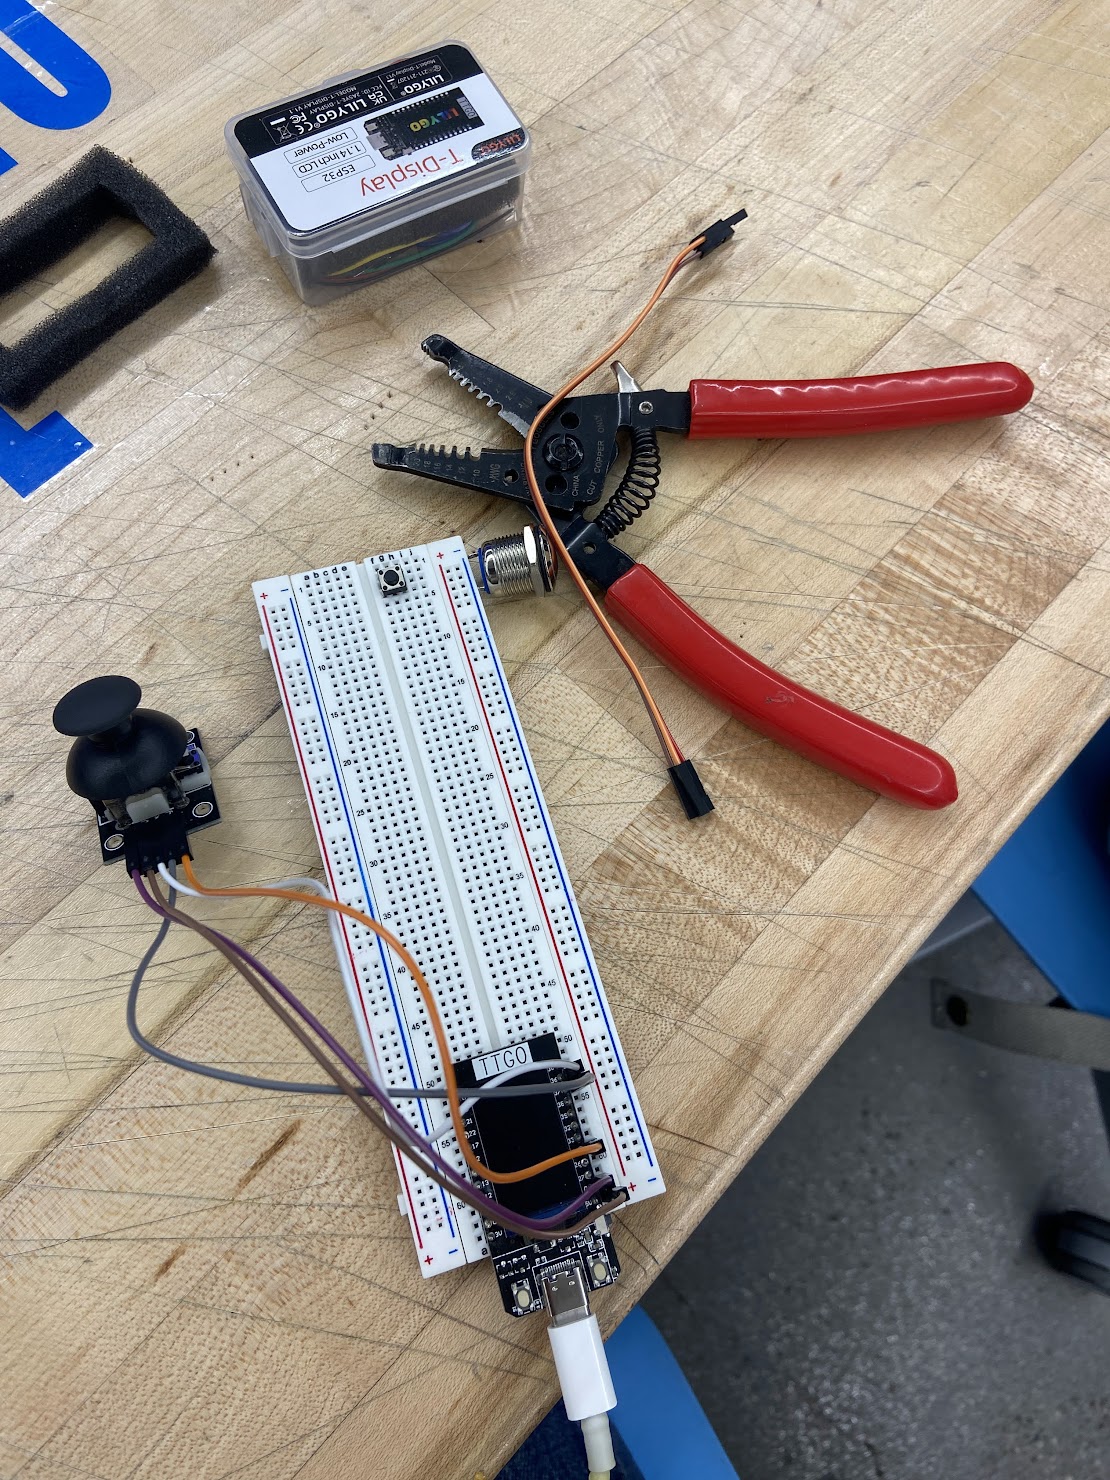
1. Connecting the ESP-32 to the joystick and button with a breadboard and wires
I first plugged the ESP-32 into my computer using the USB-C cord to power it on. I plugged my ESP-32 into my breadboard, and then I used male-to-female wires to connect each pin of the joystick to the respective pins on the ESP-32. Two of those pins provide power to the joystick (5V and Ground), and must be connected to the 5V and Ground outputs on the ESP-32 and the other 3 read the x, y, and z coordinates of the joystick and can be attached to any numeric pin on the ESP-32. I used pins 36, 37, and 2, respectively, but you could use any.
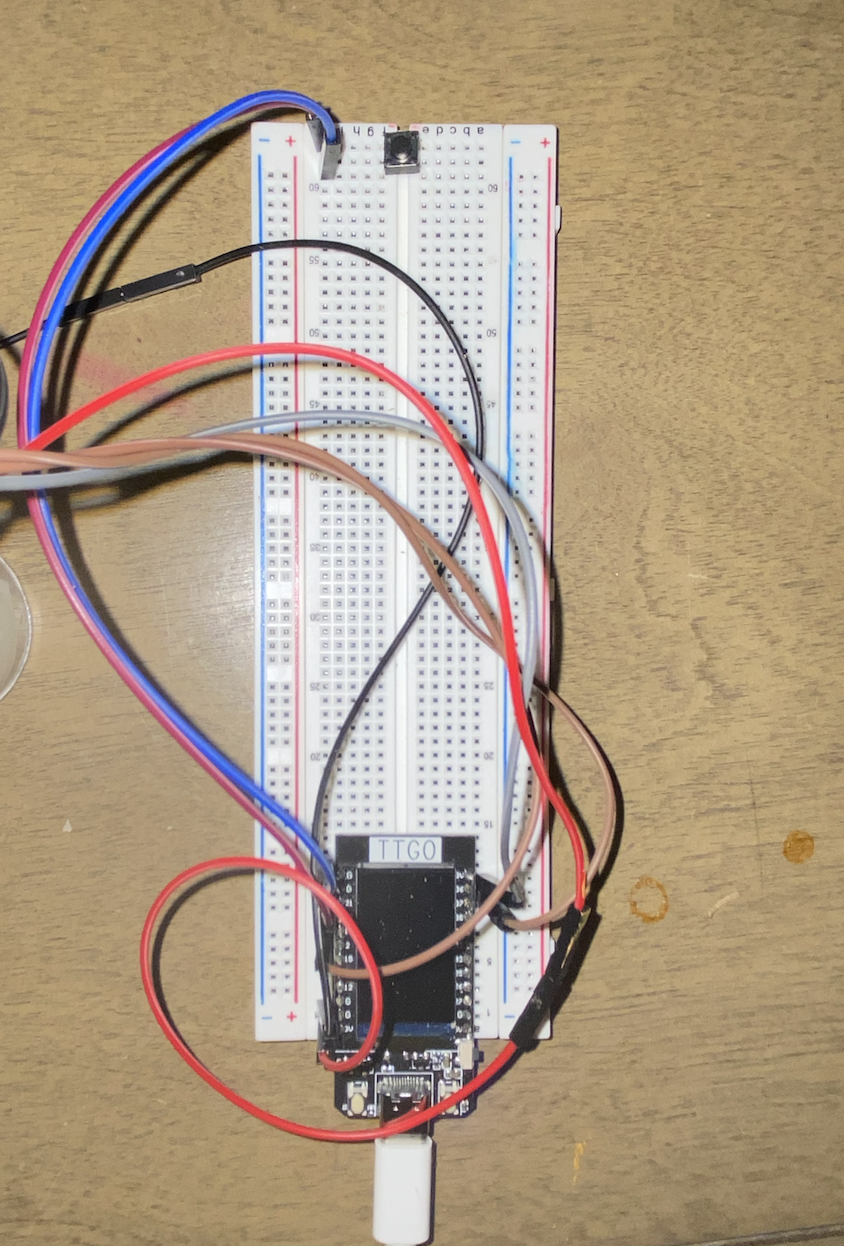
Then, I plugged the button into the breadboard. To make the button functional, you need to connect it to Ground and to a numeric pin on the ESP-32 using wires. I used 22 as my pin, but any will work.
This was my final setup of the board:
2. Programming the ESP-32 to read and print joystick and button data numerically
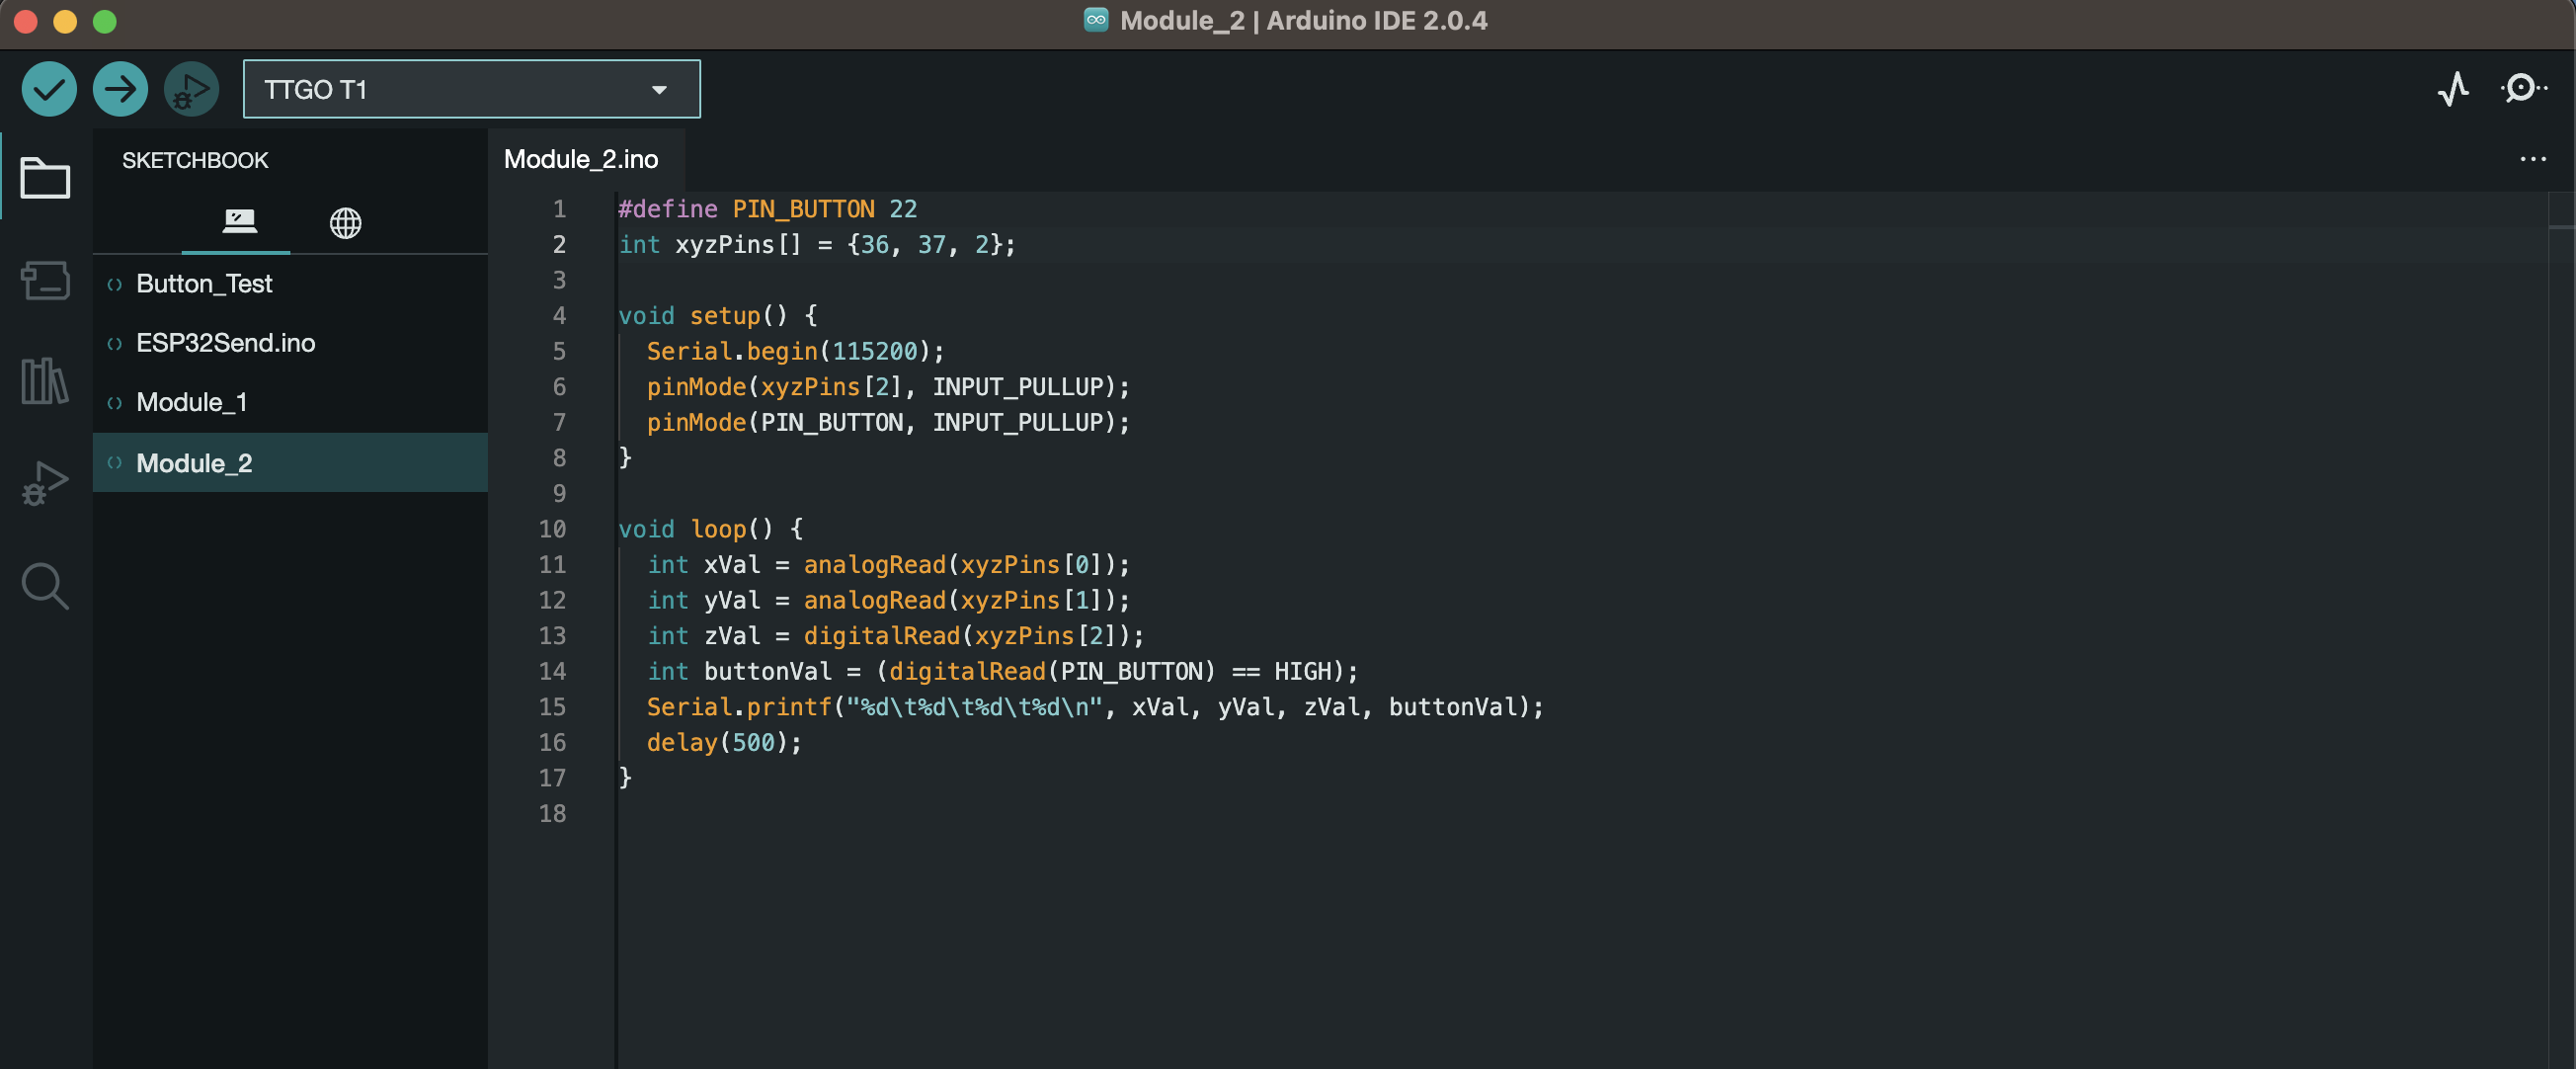
Next, I programmed my ESP-32 to write the input it received from the joystick and button to Serial. There are four pins receiving input on the ESP-32: the x-, y-, and z-values from the joystick; and the value from the button.
The x- and y- values from the joystick range from 0 to 3600. For the x-value, 0 represents all the way left, and 3600 all the way right. For the y-value, 0 represents the position of the joystick all the way down, and 3600 all the way up. Any intermediary value reflects an intermediary position.
For the button and the z-value of the joystick, an output of 1 means that the button is not being pressed. An output of 0 means that it is being pressed.
There is more detail about my code on my GitHub, but here is a screenshot for reference:
3. Using Processing to interpret the numeric joystick and button data
In Processing, I read in the data from the ESP-32’s serial output to move images around on the screen of my laptop. The Processing program begins by loading in an ArrayList of images, and chooses one at random by indexing the ArrayList with a random number generator. Then, it repeatedly gets the numeric data from the ESP-32’s serial output that describes the positions of the joystick and button. Depending on what the user is doing with those inputs, the Processing program either moves the image, places it, or randomly selects a new image.
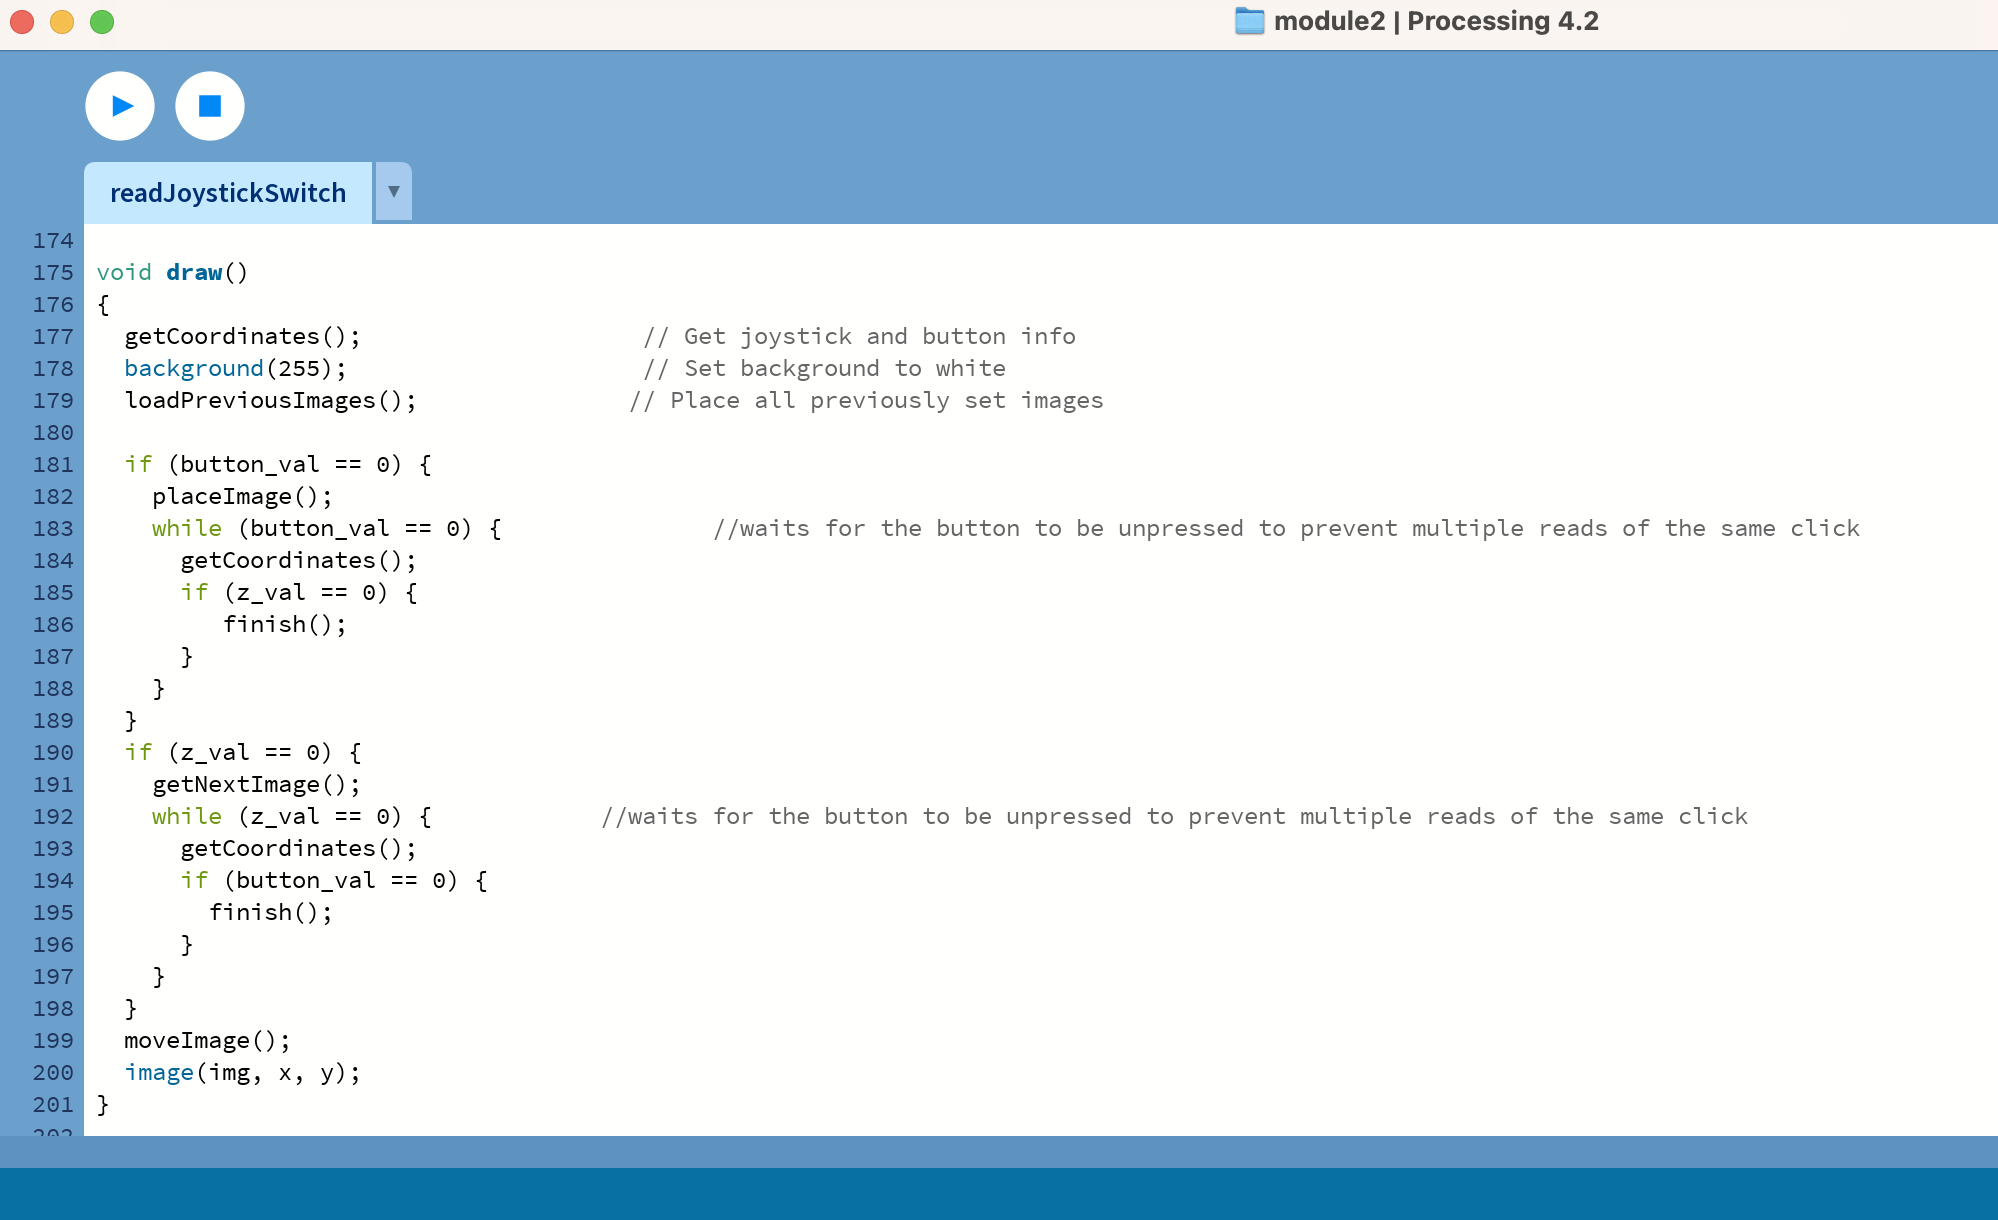
See my GitHub for more details on how the code works!
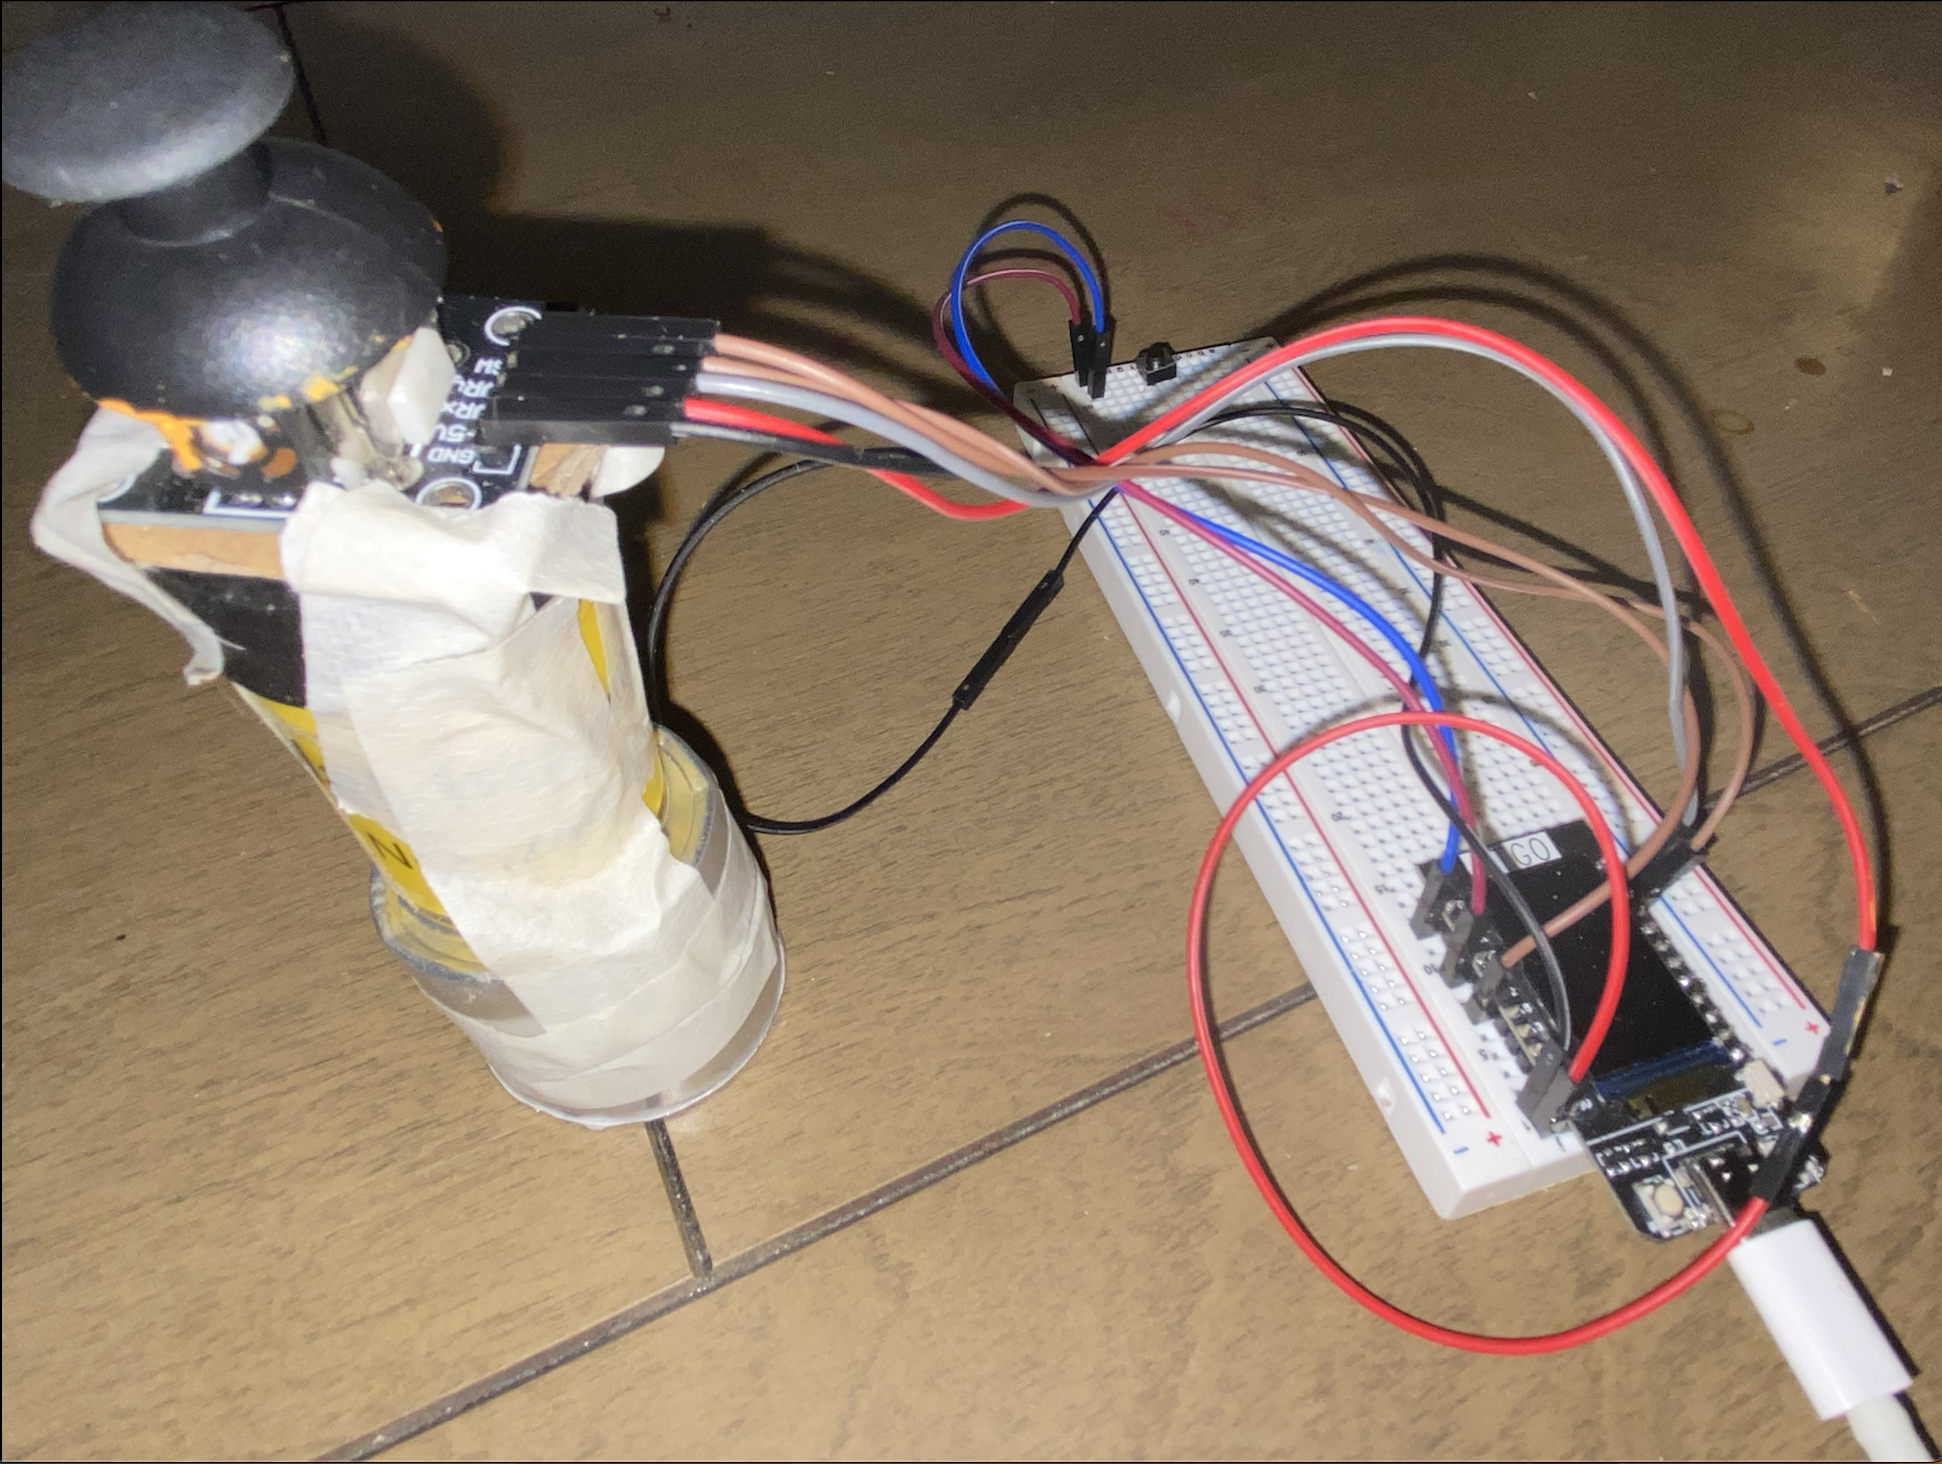
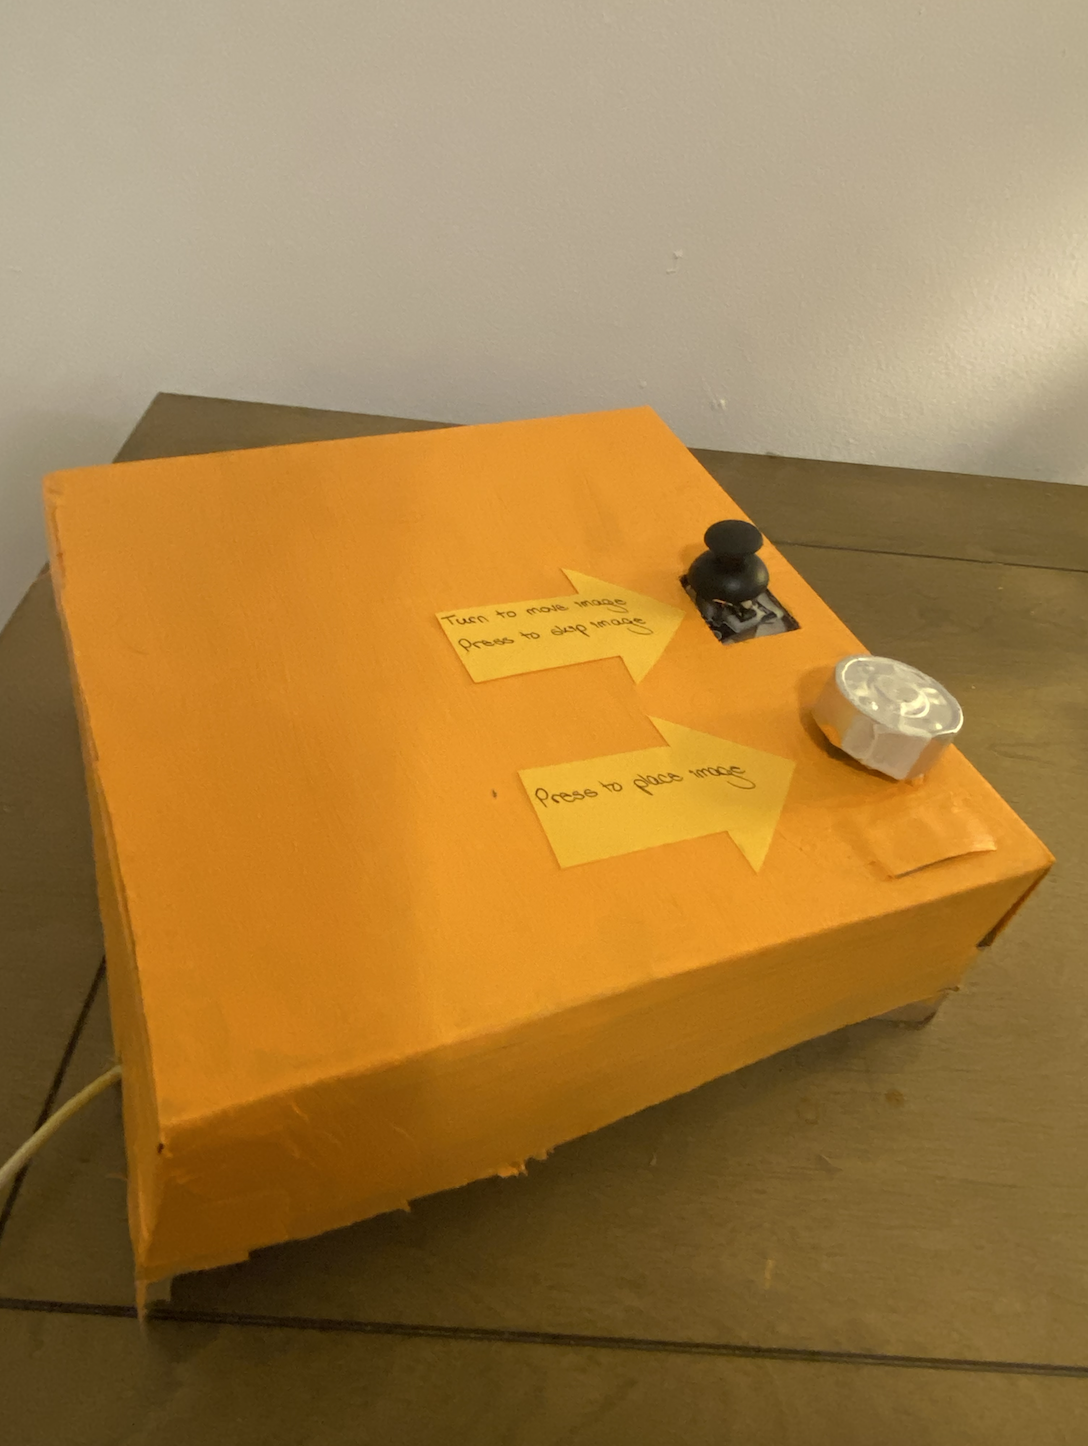
4. Making the enclosure
I made an enclosure out of an old cardboard box to hide the breadboard and wires. I made a larger button to go on top of the one on the breadboard out of a tea light so that it would be easier to press. There is a slit in the side for the USB-C cord to thread through so that it can plug into the computer surreptitiously.
5. Finished product
Here is an example of a collage that I created with this device:

And here is a video of how the device works in practice!
Thanks for tagging along with this post! More creative embedded systems projects to come soon!
CREDITS
This project was completed for Module 2 of Mark Santolucito’s Creative Embedded Systems course at Barnard College. See more about the assignment and his work on his website here!